The Great Shaft (part 1)
The first thing you will see in the Cleft is Esher, who will approach you, offer his assistance, and also warn you not to give the Tablet to Yeesha. One thing worth noticing about Esher is the glyph on his left shoulder—you will come across it again later. He will instruct you to look for the hole in the ground, and tell you that he will find you there (read more).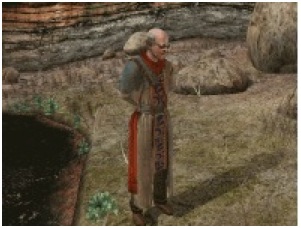
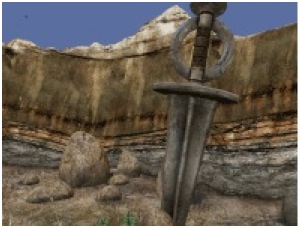
Before looking for the hole, however, it is worth taking a look at the area in which you are currently in. Players of Riven: The Sequel To Myst will immediately recognise the oversized Moiety dagger: the official Myst V guide suggests that this is actually one of the daggers from Riven, displaced after the Age was destroyed. The engravings on the stones which surround the area are also worth examining: apparently drawn by the Bahro, they depict significant events in their history, some of which will be familiar to players of the previous Myst games, others from Atrus’s opening speech.
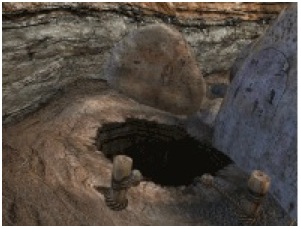
Behind one of the largest stones you will find the hole mentioned by Esher and a rope ladder. You should climb down into the cavern below.
This cavern is also occupied by a couple of Bahro, who, needless to say, flee at your approach. On the other side of the cavern is a constructed corridor leading left and right.

To the right is a chest with another camera and D’ni journal, if you missed them in K’veer, and propped up against the chest is the prologue to Yeesha’s journals, all of which you should collect on your way through the Great Shaft. There are 12, including the Prologue (read more).
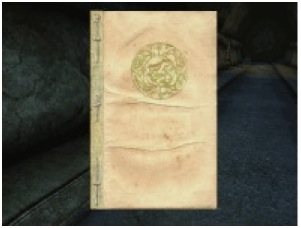
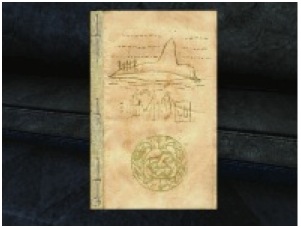
Not far ahead, next to a small lamp, is the first real journal (read more). The sharp-eyed will also notice the same drawings on the covers of the journals as were engraved on on the stones in the Cleft area above: this one depicts the arrival of Atrus and Catherine on Myst Island, before the events of Myst, and this is also described in the text. On the last page of the journal is a sketch of the island.
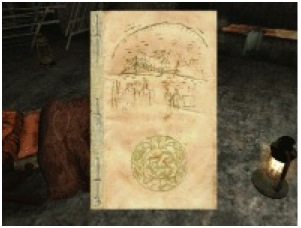
Once you have listened to Yeesha’s reading of the journal, proceed along the corridor and enter the room on the left (Rest Area A), where you will startle yet another Bahro. On the bench immediately in front of you there is the second of Yeesha’s journals (read more), the cover depicting Atrus and Catherine settling on Myst Island with their sons Sirrus and Achenar, while the text continues the story of Myst.
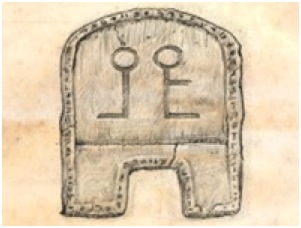
On the final page of this journal you will find a glyph which can be written on one of the Slates. Precisely what the function of this glyph is, I am not sure, but the word preceding it in the text is “Friendship”. It seems to cause the Bahro to bow, and possibly symbolises respect.
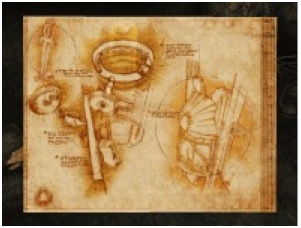
Lying in the alcove behind the bench you will find a a sheet of paper. It isn’t possible to read the words on the page, but the diagrams describe the elevator mechanism for travelling to the next level of the Great Shaft. It has a D’ni Restoration Council stamp in the lower left corner.
By the entrance to the room you will find an imaging device not dissimilar to those used by Saavedro in Myst III: Exile. Press the blue button to start playing the message (read more).

The message clearly displays a side of Yeesha which we haven’t seen before, and is much darker than her journals to date.
The final remaining object of interest in the room is a linking book which will take us to the first island of Direbo. You should now click on the moving panel—the Gateway Image—to be taken the Age; we will continue exploring the Great Shaft later.
(Note: it is also possible explore the entirety of the Great Shaft now. There are four levels, each with its own linking book to a different island of Direbo, which in turn leads to one of the main Ages of the quest. It is not necessary to visit any other Ages in order to progress through the Great Shaft. However, the first major Age, Tahgira—which is accessed through the linking book before you now—has an introductory character, whilst the Laki’ahn—accessed from the deepest level of the Great Shaft—is best left to last.)
Footnote
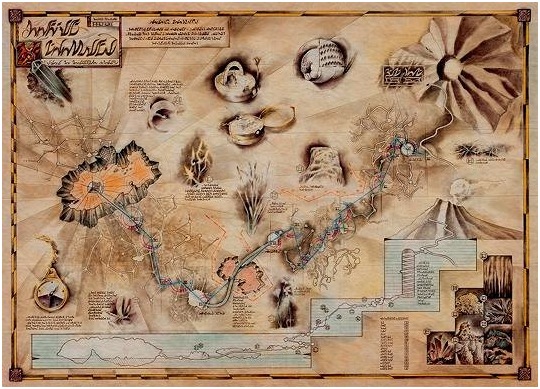
For an overview of the way to D’ni, of which the Great Shaft is the first part, you might like to examine the D’ni Map. It is reproduced for convenience below, but the website linked to contains a great deal of information about the map, such as translations of all the inscriptions. Well worth a visit.
––––––––––
previous << | >> next