Todelmer (third to final pedestal)
When you arrive at the third pedestal, head toward the large building; Esher will appear briefly and and inform you cryptically that “your destiny does not lie here, but above”. Apparently, you will also have to find a way to make the Bahro align the planets (read more).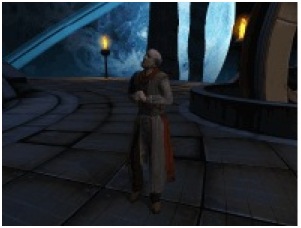
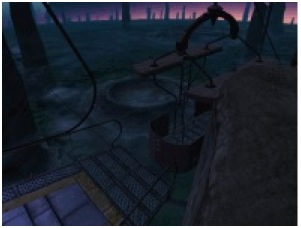
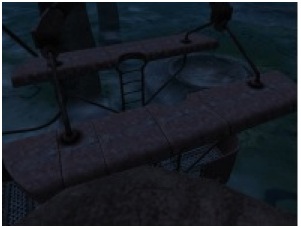
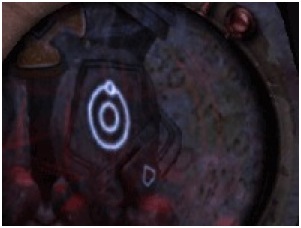
The door to the building is locked, and so you should descend the steps next to the pedestal. At the bottom you’ll will find another small telescope, which reveals nothing of interest when you look through it. You are unable to get to the dock from here, since you are too high up. The cable-car, which you moved away from this dock earlier, has ladders on the side of it that would have allowed you to climb down, if it had been properly in dock itself; but as it, is, you have no choice but to return to the main rock column and return the cable car to it’s original position.
Go back to the pedestal and link to the main rock column. From there you’ll have to make the long hall back to the top of the column. Then enter the building and descend to the docking area. Flip the top lever to the left and push the front lever down as many times as you did before. Give it one more push for luck: if the cable car has entered the dock on the other side, the pulleys will no longer spin. Then return once again to the main pedestal and link back to the third.
When you return to the landing with the telescope, you will find that you can now walk onto the upper deck of the cable car, the climb down the ladder, and enter the dock. The lever inside the car doesn’t seem to work.
Once you enter the building, you’ll find a device like the one in the observatory which you used to switch on the electricity there. The operation of the device is the same, but the settings are different. This time you need to move the right-hand lever to the middle position, and the left-hand lever about two-thirds of the way up.
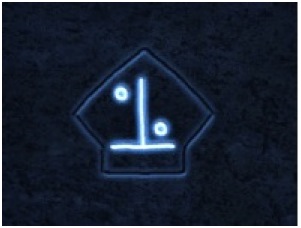
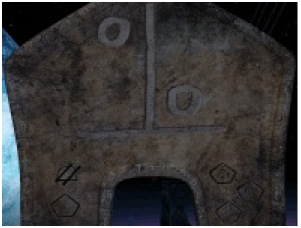
Climb the staircase now—left or right makes no difference. At the top there is another hidden staircase, which you can lower by pressing the button on the right. As you ascend, you’ll notice the same map on the wall as in the building on the top of the main column. At the top, to the right on the door, there is a glyph inscribed on the wall—this Age’s environmental manipulation glyph. What it does, we’ll find out soon.
You can now open the door—obviously, it needed electricity to become operational. Perhaps the same was true of the cable car? Head back to the car and try the lever again. It works! The doors of the car swing shut, and you find yourself being carried high above the surface of the planet on a disturbingly-thin cable. About half-way across the cable halts at a column. Turn left (if you are facing the way the car is travelling) and you’ll see four glyphs engraved onto the central support.
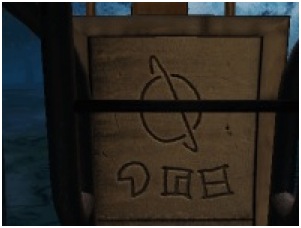
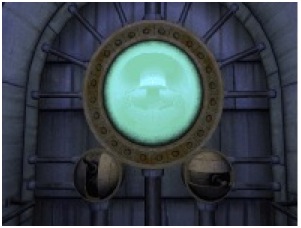
A quick look at the map will confirm that these are the co-ordinates for the final working telescope. The D’ni numerals stand for 4 and 5 respectively; and while the upper glyph clearly represents to the ringed planet which dominates the sky, its significance is as yet unclear. Once you have noted the glyphs down, pull the lever in the car once more to finish the crossing. Then return to the observatory and set the final control panel—the rear-left one—using the new numerals. On the lowest magnification, the screen now shows part of the ringed planet.
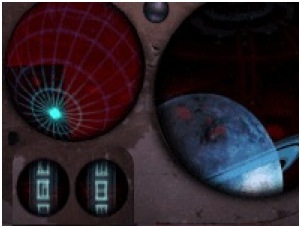
That must be why the glyph for the ringed planet appeared along with the co-ordinates for this control panel. However, increasing the magnification will reveal that the telescope is not centred in on the planet—and you should also notice that the rings of the planet are at a different angle on the screen to on the engraving. That is what Esher meant earlier when he spoke of aligning the planets. Merely adjusting the telescope will not do the trick: it is the planets themselves which need to be brought into line with the telescopes!
Head back outside and collect the Slate from whichever pedestal you left it at—the third, if you’ve been following this walkthrough, and assuming you didn’t bring it with you. Then come back to the sphere and write the Age’s environmental manipulation glyph on it. You have a good view of the ringed planet from here, so it’s a good place watch what happens.
The glyph instructs the Bahro to speed up time, as you can see from the motion of the clouds below you and the starry heavens above. And the rings of the planet also gradually rotate, but during the 90 seconds which the effect lasts, they don’t move far enough. You’ll have to write the glyph a second time to make the rings of the planet match the angle you saw in the engraving.
When the second 90 seconds are up, return to the observatory, and to the final control panel. As you increase the magnification from the lowest to the highest setting, you’ll find that you centre in on the rings of the planet; and at the highest magnification you can clearly see a pedestal and the glyph written on it! Logically enough, the glyph seems to be an abstraction of the planet and its rings. Remember Esher’s remark about your destiny not being here, but above? Now you know!
The only thing left to do is to write this glyph on the Slate for the Bahro to transport to the final pedestal; if you draw the glyph on the Slate in the observatory, then return to the control panel, you can even watch a Bahro placing the Slate onto the pedestal. Once that is done, link yourself there from the main pedestal.
When you arrive, Esher will appear and once again warn you not to give the Tablet to Yeesha when you have it—indeed, doing so would destroy the D’ni completely, because of her greed for power (read more).
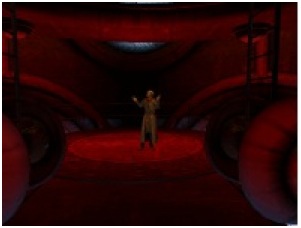
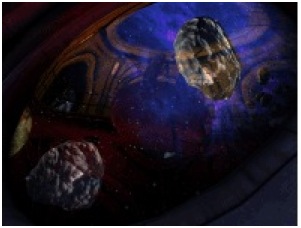
If you want to explore the space station on which you now find yourself, there are two ladders ahead of you on the left and right. Climb those, and you will be able to observe the planets, asteroids and stars circling around you.
Behind you, on the other hand, is a ladder leading down to the Keep. Enter the sphere and touch the Slate, changing it from its insubstantial blue to its corporeal form; then link back to the main pedestal, and from there to Direbo.
––––––––––
previous << | >> next