Tahgira (third to fourth pedestal)
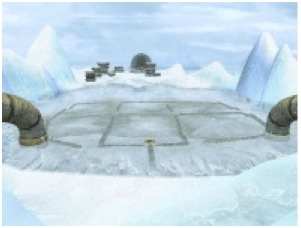
Once you’ve brought the Slate to the third pedestal, you should walk up the stone steps towards the central building. There is a smaller building in front of it, with what looks like a lever of some kind, but before you can examine it Esher will link in. He will talk about the great ingenuity of the D’ni, being able to find ways to build and survive in even the most inhospitable environments, and about how justice is at hand (read more).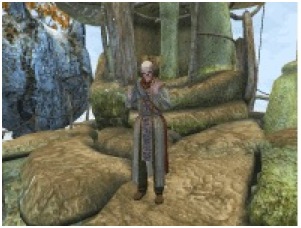
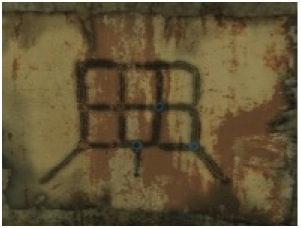
Ignoring the smaller building for a moment, go inside the large central building and up to the map on the back wall—you should have been able to see it from where you were standing while Esher was talking. Make a note of it, taking care to note down the colours at each junction; it will be important soon. Then head back to the smaller building.
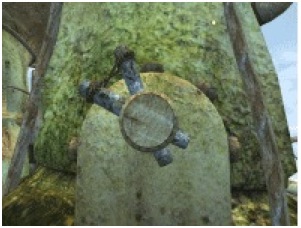
The smaller building does indeed have a lever of some kind. You won't be able to touch the lever if you are carrying the Slate, in which case you should to place it upon the nearest pedestal. When your hands are free, you'll find that it has only two settings: left and right, but there is no way of telling what it does. You found it in the ‘left’ position, so try setting it to the ‘right’. Why? Because, as Myst hacks will know, it’s a rare puzzle if everything isn’t set to ‘off’ by default.
There are several similar buildings in the village: six in all. You should keep exploring first to find out what switching that lever achieved—if the others are all set to ‘off’, and this one to ‘on’, the change should register somewhere. Walk away from the building, up to the pedestal and then head to the right of the pedestal, behind the central building. The first thing you should reach is some kind of junction of the pipes running from the small buildings.
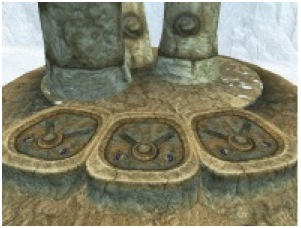
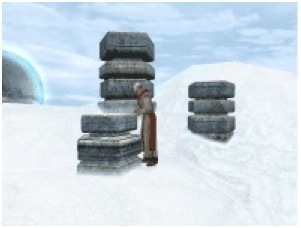
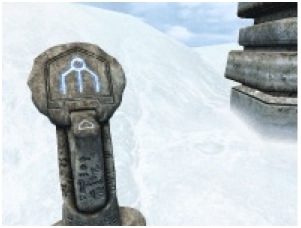
There are three levers, each with three settings—so you can’t use the ‘off by default’ trick here. You can’t even touch the levers at the moment, with or without the Slate. But notice that each of the levers has a small circle next to the right and left positions of the lever, and that these circles are split in half, with one side blue and the other side white. Turn around 180°, and you'll find a similar junction of pipes, this time with red and white circles. If you recall, the map in the central building had red and blue junctions too; each of these levers corresponds to one of the junctions on the map.
From the ‘red’ set of levers, turn right and head further away from the central building, along the large pipe. You soon reach a small lake which it is currently impossible to cross; on the other side, in the distance, lies another sphere, the Keep. And beneath the surface of the lake is a network of smaller pipes, corresponding to the map in the central building.
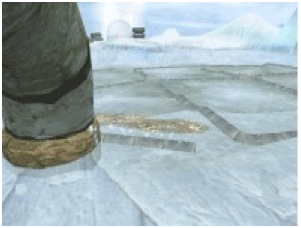
It’s now time to activate the steam again—if you don’t have the Slate with you, collect it now and return to the area just above the lake. Using the short-cut in the bottom-right corner, write the glyph for Steam on the Slate—then put it on the ground and back away. As before, a Bahro will appear and the steam will begin to rise. Pick up the Slate again and look around. Four things are now noticeable. Firstly, when you stand next to the ‘red’ set of levers, a rushing noise is audible; the ‘blue’ set is still silent. Secondly, fire and smoke are now rising from the top of the central building, and thirdly, steam is now rising from the smaller building beside it—the one where you turned the lever to the right. None of the other buildings have steam rising from them. And finally, a wall of steam seems to have arisen in front of the distant sphere.
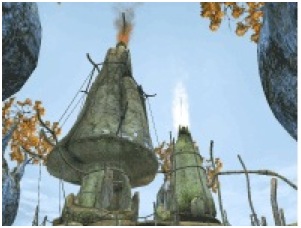
So clearly, moving the levers on the smaller buildings—the thermal engines, as they’re called in the official Myst V Guide—to the right switches them on, and channels energy to both the central building and the sets of levers. You should now leave the Slate at the pedestal and visit the other buildings, switching the lever to right in every case. As you reach one of the buildings (I think the third one that you visit) Esher will appear again, and cryptically inform you that there is life in the water which seeks heat (read more).
Finish setting all the switches to the ‘right’ position, then pick up the Slate from the pedestal and return to the lakeside. Write the Steam glyph again, remembering to pick up the Slate again once the Bahro has departed. This time, when you look at the sets of levers, they are elevated and can be turned to different positions.
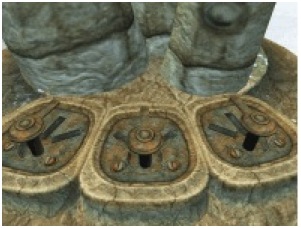
When the levers are in the default position, nothing seems to happen, so we can surmise that this is the ‘off’ position. Try switching the first lever of the red set—the one on the left—to a different position. Returning to the lake, you will see that a kind of crust seems to have formed above one of the pipes.
Remembering that your aim is to be able to cross the lake—rather than creating a circuit, which is impossible with this set of pipes—and referring back to the map in the central room, it should be possible to work out which positions the levers have to be switched to. Stood facing each set, the correct positions are: red set—left, right, left; blue set—right, left, left. You will probably need to activate the steam more than once to set the levers correctly, as some are a little ‘sticky’ (changing to realtime motion—press 3 on the keyboard—helps here because you can align yourself directly in front the levers, making them easier to turn).
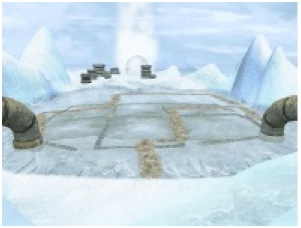
It is now possible to walk over the encrusted surface of the water. Last time he spoke to you, Esher said that there were organisms in the water which were attracted to heat—so much so, in fact, that they crowd together so densely that they form a solid material. According to the official Myst V Guide, the prisoners here learned to use this material to create objects and as a source of food. Once you reach the other side of the lake, Esher will appear once more (read more). He will offer a clue about how to proceed: “Make them bring you to the keep, for it will run from you.”
Before finding out what he means, however, turn to the fourth pedestal and note down its glyph.
––––––––––
previous << | >> next