Laki'ahn (third to fourth pedestal)
As you arrive, the podium will lower to the second level. Pick up the Slate and take it with you: even if you need to drop it later, the Bahro will only return it to the first pedestal, which is a lot more convenient that the third pedestal on top of its podium! Then turn around and step onto the bridge; the podium will rise to the third level again. Finish crossing the bridge and head right. Just around the corner you will find a short tunnel cut into the amphitheatre; as you approach it Esher will appear. He seems to hardly register your presence as he reminisces about the “great sport” which took place in the arena, and the great jewels “freed from the Laki”—the sea creatures, no doubt—“painted with their blood” (read more). With that, he will link away.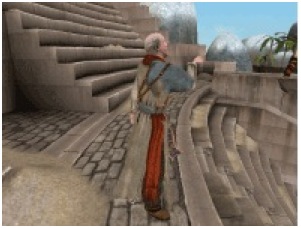
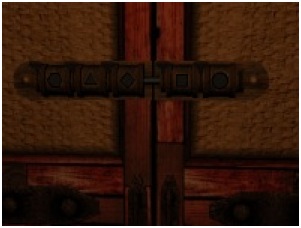
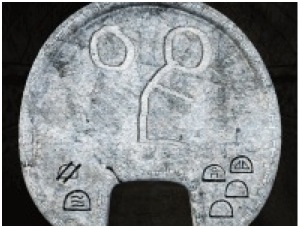
Walk into the tunnel. Ahead of you is a double door, resembling the one to the building next to the sphere. You should recognise the geometric shapes from the piece of paper you saw through the window earlier. Remembering that it was upside down, press the switches to the left of each shape in the following order: circle, square, triangle, hexagon, diamond. Then the doors will unlock and swing open, allowing you to enter the building.
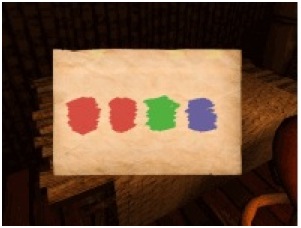
Once inside, cross the room to the double doors opposite; as you open them you will see the sphere ahead of you. Then turn and go into the room on the left; on the table with the jewel you will find a piece of paper with four colours on it. The sequence is red, red, green blue; note this down.
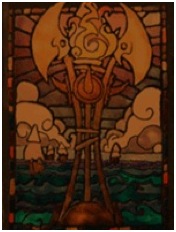
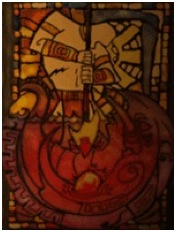
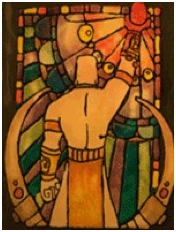
Exploring the rooms further will reveal a series of paintings; from left to right, these (presumably) depict the hunt for the great sea creatures; then the warriors of the local people (the Kresh as Esher will tell you later) fighting the Laki in the arena; and then the jewels of the Laki (their hearts?) being presented to the watching D’ni.
Head back outside to the amphitheatre; as you leave the short tunnel look downwards. At the end of the aisle the wall is broken, allowing you to climb down into the arena. Don’t go down just yet, but instead turn left and walk to the end of the balcony. There is a column with a red button on top of it; when you press the button, a small gate opposite will open in the arena.
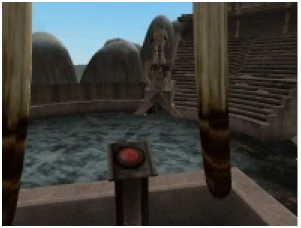
At the other end of the balcony—above the gate which just opened—is another button, which opens a second gate; but you only need to open one of the gates. Go back to where you saw the broken wall and climb down into the arena; then walk over to the gate you just opened, and into the corridor which lies beyond. After a sharp turn immediately after you enter, the corridor will arch right for some time and then you will reach a junction to the left. Take the turning and follow the corridor as it now curves left. After a while you will find what looks like another podium in front of you; a short way from that, a red drum with handles; and further still, at the end of the corridor, a metal plate on the ground.
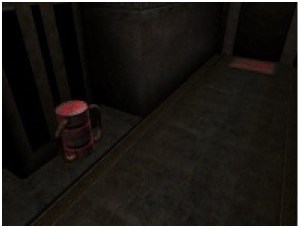
When you stand on the plate, nothing seems to happen, although there is a noise as you step on it and then off it. The drum can be lifted, and remains in place after you let go of it; but to do so you will have to put the Slate on the ground. If you now go back and stand on the metal plate, the drum will fall, but the podium will rise, taking some 10 seconds to reach its full extent; when you step off the plate, the podium will fall. Lift the drum and stand on the plate again, but this time step off the plate before podium has risen fully; it will immediately start to fall.
Clearly another pressure pad problem, and again the solution lies with leaving the tablet on the plate and summoning the Bahro. Unlike Tahgira, however, mere weight will not do the trick; and unlike Noloben, you need pressure to be applied to the pad continuously for at least 10 seconds. If you don’t have the Slate with you, you’ll have to collect the Slate first.
The only glyph which will work—which will get a Bahro to stand still for long enough—is the glyph for “sing”. Draw it on the Slate, then stand on the metal plate, facing the podium, and drop the Slate on the ground. Doing so will drop the Slate in front of the metal plate, so that when a Bahro appears, it will be standing on the metal plate. If you drop the Slate while facing the wall at the end of the corridor, it will be the Slate that is on top of the metal plate, not the Bahro. Then go to the drum and lift it—no Bahro will appear until you have stepped away from the drum and onto the podium (this is easiest to do in realtime mode—3 on the keyboard—as it is too easy to be catapulted to the junction at the end of the corridor otherwise). When one does, you will find yourself lifted to the next level while it sings; step off the podium quickly when you reach the top, as it will fall again shortly after.
Looking around will quickly reveal that you now find yourself in a maze, with four corridors leading off the central area, and each forking after a short distance. However, at each junction there is a different coloured light. Remembering the piece of paper you found on the table not long before, the correct path must be red, red, green, blue. From this central area there are two red lights visible, one down a long corridor, the other down a short one. If you follow the short one you will find that although a second red light is visible at the first junction, upon reaching it you will be given a choice between yellow and blue, so head back to the centre and take the longer corridor. Press the red light when you reach it. Then turn to the second red light and press it; then right again to the green light and press it; then left to the blue light. When you press the blue light, the wall will swing outwards, allowing you to step onto a beach. You must step out immediately, or the door will close, and you will have to return to the first red button and enter the sequence again.
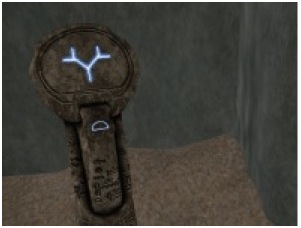
Once outside, to your right you will see the fourth pedestal; note the glyph down—which clearly symbolises the maze you have just passed through—then link back to the first pedestal (where the Bahro took the Slate after singing) and mark the glyph on the Slate. Then return to the fourth pedestal using the newly-illuminated glyph.
––––––––––
previous << | >> next