Todelmer (second to third pedestal)
Once you have linked to the second pedestal, you will see another small telescope, which you should look through. As you saw on the map, there are two large telescopes between this rock column and the one with the pedestal which was facing the wrong direction; the first of those telescopes, which you just moved using the control panel in the observatory, seems to be directly at right angles to you now; but the view of the other rock column is still blocked by the second large telescope. If you rotate the the small telescope to the right, however, you should be able to make out three glyphs on the main rock column from which you have just linked. Once again, these are situated below the dock for the cable car.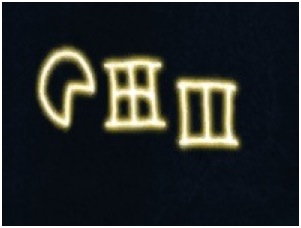
Referring back to the map, you will notice that first glyph represents precisely the telescope which is obstructing your view of the other column. The D'ni numerals stand for 6 and 1 respectively.
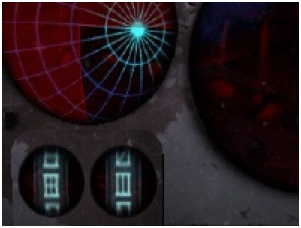
Return to the pedestal, leaving the Slate where it is, and link back to the main column. Then go back to the observatory and enter these numerals into the appropriate device—the first on the left. Once again, the level of magnification is unimportant.
Leave the observatory again. walk back to the main pedestal and link to the second column. On the small telescope, move the left-hand lever until it is exactly in the middle; then rotate the telescope using the lower-right lever. As you do so, it will become clear that the top of the final rock column is mostly visible; indeed, through the eye of one of the nearest telescope's brackets, it is possible to make out the third pedestal and its glyph.
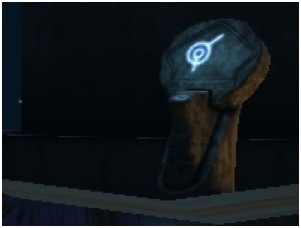
As usual, collect the Slate from the pedestal, and write the glyph on it so that a Bahro will take it to the third pedestal. Link back to the main pedestal, and then on to the third.
––––––––––
previous << | >> next