Tahgira (first to second pedestal)
When you arrive in Tahgira, the first thing that you will notice is that the walls of the sphere seem to have changed, and that they now seem to show Direbo. The glyph on the left of the pedestal is no longer illuminated—and is therefore inactive—while the one in the centre is. If you press this glyph, you will be returned to Direbo.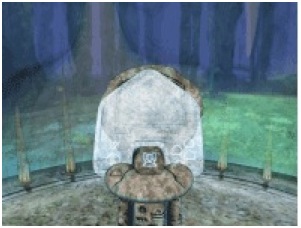
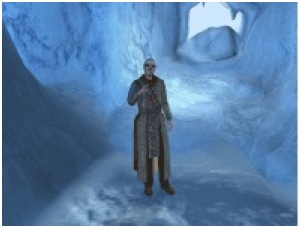
Leave the Slate on the pedestal where it is for the moment. Turn around and through the walls of the sphere you will see Esher waiting for you. When you approach him, he will begin to speak (read more). He will explain that Tahgira is one of the D’ni Prison Ages, as well as introducing you to the basics of the Slates, and also advise you to “use the Slate to free yourself.” (An interesting technical note is that the middle section of this speech would occur in whichever Age you visited first.) Before linking away, he says that the Slate is heavy, but that this can be used to your advantage. As with many of Esher’s speeches, this is a hint about how to proceed.
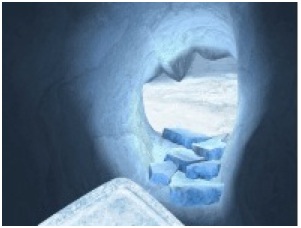
If you walk away from the sphere and up the slope you will find that the way is blocked—you will have to find another way out of this icy cavern. About half-way up the slope (on the left, if you are facing the blocked exit) you will find, carved into the ice, the shape of a Slate—the same Slate as in the sphere. It isn’t very clear, either in the cave or in the snapshot below—look carefully.
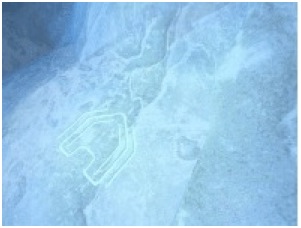
If you stand on this patch of ice you will hear a cracking sound—you will need something heavy to break through the ice. This is what Esher was referring to earlier. Return to the sphere and pick up the Slate (by hovering your hand over it and clicking). We’ll examine the Slate more carefully later. For now, if you take it and stand on the carving, the sound of cracking will increase, but still the ice will not break. Place the Slate on the ground (by hovering your hand over the the edge of the Slate and clicking) and back away. Notice that the Slate becomes an insubstantial blue when out of your touch. The ice will crack a little more—as if the Slate were heavier without you—and then a Bahro will appear, place its hand on the Slate, and both will disappear (glyphs such as those for Sing, Snake and Friendship may also be written on the Slate, causing a Bahro to appear, then disappear without taking the Slate with it).
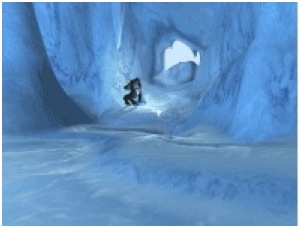
In the meantime, the ice will have cracked a little more under the weight of the Bahro. Turning around to face the sphere you will see the Bahro reappear and place the Slate back on the pedestal—the Bahro will do this whenever you leave Slate unmarked and unattended. The ice, if you test it, will still not break under you weight. Return to the sphere, pick up the Slate, and go back to the crack. Finally, the ice cracks and sends you tumbling—unhurt—into a smaller cavern, from which it is easy to exit. Before you do leave, however, note that it is now impossible to return to the cavern with the sphere.
As you leave this second cavern, you will see trees in the distance—odd, in a frozen land such as this—and a ladder against a sheer wall of ice, leading to another pedestal. There is also a glyph etched on the wall next to the pedestal. If you approach the ladder and try to climb it, you will find that it is impossible to do so while carrying the Slate—it is too heavy! This is a common problem throughout the game. With no other choice, you will have to leave the Slate on the ground; as before, when you back away from it, a Bahro will appear, touch the Slate, and both will disappear—and you will hear the Slate being replaced on the first pedestal. But now you are free to climb the ladder.
At the top of the ladder you should approach the pedestal—we’ll deal with the glyph engraved on the wall later. Notice the glyph on the face of the pedestal, and that it only has one glyph which can be pressed. Note down the main glyph, and then press the other. You will be returned to the sphere in the first cavern.

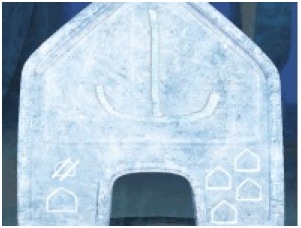
Now you have some idea of how the pedestals work. In each Age there is a main pedestal, and several minor pedestals, which can be used to link back to the main one. The main pedestal has four sections: the one on the left contains the glyph for the main pedestal, and is usually dimmed unless you are in Direbo; the middle section has space for the glyphs of the minor pedestals; the one on the right will contain the glyph of the final pedestal (in the Keep), your goal in each Age; and the one at the top contains the glyph for Direbo. Notice, however, that although you have already used the second pedestal in this Age to link back to the sphere, its glyph has not yet appeared on the main pedestal. There is another step first.
Pick up the Slate from the pedestal again, and write the glyph of the second pedestal onto it:
Then simply drop it on the ground somewhere, and back away from it. A Bahro will appear and take the Slate to the second pedestal:

This is the basic way of transporting a Slate to pedestal to another: write the the glyph of the pedestal on the Slate, and let the Bahro carry the Slate there. The Bahro are usually quite tolerant of our unfamiliarity in writing their language, and if they can guess what glyph you were trying to draw, they will follow your instructions. If they can’t make it out, on the other hand, they will simply scratch their heads and link away.
If you go (or link) back to the main pedestal, you will now find that the glyph of the second pedestal is visible, and you can link back and forth with ease. If you look at the Slate, you will also find that the glyph for the second pedestal now appears in the lower left corner—if you press this now the glyph will be drawn on the Slate.
––––––––––
previous << | >> next